The Ultimate Homemade Rotisserie Chicken Recipe: Perfectly Juicy, Flavorful & Easy
There’s nothing quite like the aroma and taste of a perfectly cooked rotisserie chicken. The golden-brown skin, the incredibly juicy and tender meat – it’s a culinary experience that brings comfort and joy to any meal. While store-bought options are convenient, mastering the art of homemade rotisserie chicken elevates this classic dish to an entirely new level. Imagine a chicken so succulent it practically melts in your mouth, seasoned to perfection with a blend of simple yet powerful spices. This recipe guides you through creating that exact experience, turning a humble whole chicken into the star of your dinner table.
Whether it’s a weeknight family meal or a special gathering, this rotisserie chicken is guaranteed to impress. It pairs wonderfully with a variety of side dishes, from classic French fries and creamy coleslaw to healthier roasted vegetables or a fresh garden salad. Get ready to ditch the deli counter and embrace the delicious satisfaction of cooking your own.
Why Make Your Own Rotisserie Chicken?
Choosing to make your rotisserie chicken at home offers numerous benefits that simply can’t be matched by store-bought alternatives:
- Unmatched Freshness: You control the quality and source of your ingredients, from the chicken itself to the butter and spices, ensuring the freshest possible meal.
- Superior Flavor Control: Customize the seasoning blend to your exact preferences. Want more garlic? A hint of herbs? A touch of heat? You decide, ensuring every bite is bursting with taste that suits your palate.
- Perfect Texture Every Time: Achieve that ideal balance of irresistibly crispy, golden skin and incredibly moist, tender meat with precision cooking and resting techniques.
- Cost-Effective: Often, preparing your own rotisserie chicken is more economical than purchasing it pre-cooked, especially when feeding a larger family or planning for leftovers.
- The Joy of Cooking: There’s immense satisfaction in preparing a delicious, wholesome meal from scratch and sharing it with loved ones, making memories around the dinner table.
- No Hidden Additives: Avoid unnecessary preservatives, high sodium, or other additives often found in commercially prepared chickens. You know exactly what goes into your meal.

Rotisserie Chicken
3.3 from 8 votes
4
servings
20
minutes
1
hour
30
minutes
1
hour
50
minutes
Calling all chicken lovers! This recipe brewed up by your friendly chef is exactly what you need to make your inner fire burn. Our Rotisserie Chicken is made with the best of ingredients you can find at any local grocery store. The result? A juicy and tender chicken that melts in your mouth. So what are you waiting for? Let’s start cooking!
Ingredients
-
1 (3 pound) whole chicken
-
1 pinch salt
-
1/4 cup butter, melted
-
1 tablespoon salt
-
1 tablespoon paprika
-
1/4 tablespoon ground black pepper
Directions
-
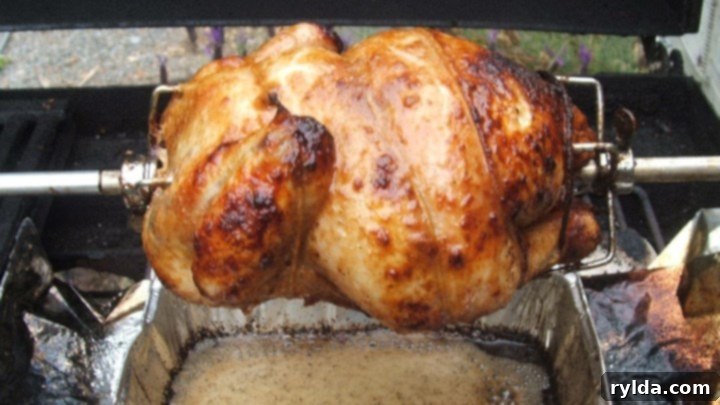
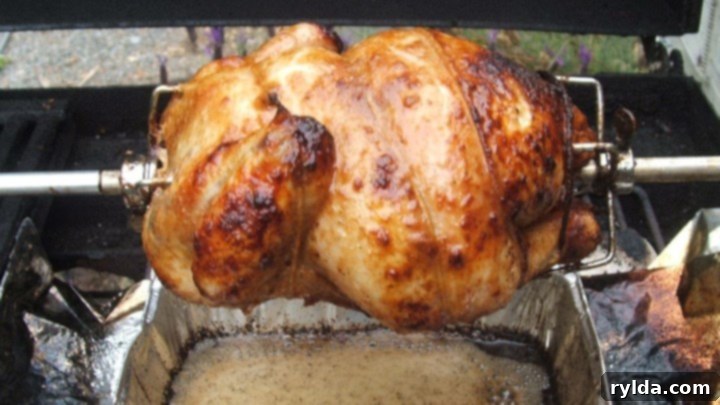
Step 1: Prepare the Chicken and Grill. First, ensure your whole chicken is well-rinsed and thoroughly patted dry with paper towels – this is key for crispy skin! Season the inside of the chicken generously with a pinch of salt. Carefully place the prepared chicken onto your rotisserie rod, ensuring it is balanced and securely fastened. Preheat your grill to high heat, allowing it to reach temperature before adding the chicken. Once hot, place the rotisserie with the chicken onto the grill and cook for 10 minutes on high heat. This initial burst of heat helps to sear the skin and lock in juices.
-
Step 2: Create the Basting Mixture and Cook. While the chicken is getting its initial sear, quickly prepare your flavorful basting mixture. In a small bowl, combine the 1/4 cup melted butter, 1 tablespoon of salt, 1 tablespoon of paprika, and 1/4 tablespoon of ground black pepper. Whisk these ingredients together until well combined. After 10 minutes of high heat, turn your grill down to medium heat. Carefully baste the chicken generously with the butter mixture using a basting brush. Close the lid of your grill to maintain the heat and continue cooking for 1 to 1 1/2 hours, basting occasionally every 15-20 minutes. Continue cooking until the internal temperature reaches 180 degrees F (83 degrees C) when measured in the thickest part of the thigh with a meat thermometer, ensuring not to touch the bone.
-
Step 3: Rest, Carve, and Serve. Once the chicken has reached the target internal temperature of 180°F (83°C), carefully remove it from the rotisserie and transfer it to a cutting board. This next step is crucial for ultimate juiciness: let the chicken stand and rest for 10 to 15 minutes. During this resting period, the juices redistribute throughout the meat, resulting in a much more tender and moist final product. After resting, carve the chicken into desired pieces and serve immediately. Enjoy your perfectly cooked, homemade rotisserie chicken!
Mastering Your Homemade Rotisserie Chicken: Expert Tips for Success
Achieving a truly exceptional rotisserie chicken involves a few key techniques. Follow these expert tips to ensure your chicken is always cooked to perfection, incredibly juicy, and boasts that irresistible crispy skin:
Ensuring Juiciness and Perfect Doneness
- The Power of Resting: This is arguably the most crucial step for a juicy chicken. Once removed from the heat, the chicken’s internal temperature continues to rise slightly (this is called carry-over cooking), and the juices, which have migrated to the center during cooking, need time to redistribute throughout the meat. Allowing it to rest for 10-15 minutes before carving prevents the juices from gushing out, leaving you with dry meat. Cover it loosely with foil to keep it warm without steaming the skin.
- Accurate Temperature Checks: The only reliable way to know your chicken is fully cooked and safe to eat is with a meat thermometer. Insert it into the thickest part of the thigh, making sure to avoid touching the bone. The target internal temperature for poultry is 180°F (83°C). Cooking until this temperature ensures safety while maintaining optimal moisture.
- Basting for Flavor and Moisture: While basting primarily helps to develop a beautiful, flavorful crust, the butter mixture also contributes significantly to the rich taste and helps the skin crisp up and brown evenly. Don’t overdo it, or you might cool down the grill too much; occasional basting is key to a beautiful exterior.
Achieving that Irresistible Crispy Skin
- High Heat Start: Beginning with high heat for the first 10 minutes helps to kickstart the browning process and render some of the fat under the skin, which is essential for achieving true crispiness.
- Dry Chicken is Key: Before seasoning, pat your chicken thoroughly dry with paper towels. Any excess moisture on the skin will steam rather than crisp, preventing that coveted crackling texture.
- Fat is Your Friend: The melted butter in this recipe is crucial. It not only adds incredible richness and flavor but also aids significantly in making the skin golden-brown and irresistibly crispy as it cooks.
Seasoning and Flavor Variations
While our recipe offers a delicious foundational seasoning, don’t hesitate to get creative and tailor the flavors to your liking:
- Beyond the Basics: Experiment with additional spices like garlic powder, onion powder, dried oregano, thyme, rosemary, or a touch of smoked paprika for a deeper flavor. A pinch of cayenne pepper can add a subtle kick.
- Citrus & Aromatics: Stuff the chicken cavity with lemon or orange halves, onion quarters, and fresh herbs like parsley or thyme for an aromatic lift that infuses the meat with subtle fragrance.
- Herbaceous Rubs: For a bolder flavor, create a dry rub with a mix of your favorite dried herbs and spices. Apply it all over the chicken, including gently under the skin, before cooking to ensure maximum flavor penetration.
Equipment & Setup
- Rotisserie Setup: Ensure your rotisserie rod is properly balanced and securely attached to your grill. An unbalanced chicken can cause uneven cooking and put unnecessary strain on your grill motor.
- Drip Pan: Always place a drip pan directly beneath the chicken on your grill. This essential step catches the flavorful drippings, which can be used to make a fantastic gravy or pan sauce, and helps prevent dangerous flare-ups from dripping fat.
Serving Your Delicious Rotisserie Chicken
The versatility of homemade rotisserie chicken makes it perfect for a variety of meals. Here are some serving suggestions to complement your culinary masterpiece:
- Classic Pairings: Recreate the classic deli experience with crispy, golden French fries and a creamy, tangy homemade coleslaw.
- Hearty Sides: Serve alongside comforting roasted potatoes, creamy mashed potatoes, or a simple rice pilaf for a satisfying meal.
- Fresh & Healthy Options: Pair with a vibrant green salad, steamed asparagus, roasted broccoli, or sweet corn on the cob for lighter, refreshing accompaniments.
- Versatile Leftovers: Leftover rotisserie chicken is incredibly versatile! Shred it for delicious sandwiches, wraps, or a quick chicken salad.
- Global Flavors: Use shredded chicken in tacos, quesadillas, burritos, or stir-fries for a quick and flavorful international twist.
- Soups & Stews: Don’t discard the carcass! Use it to make a rich, homemade chicken stock, and any remaining meat is perfect for adding to nourishing soups or hearty stews.
Storage and Reheating Tips
Proper storage and reheating ensure your delicious rotisserie chicken stays flavorful and moist for future meals:
- Storing Leftovers: Once the chicken has cooled to room temperature, remove the meat from the bones and store it in an airtight container in the refrigerator for up to 3-4 days.
- Freezing for Later: For longer storage, shredded or diced cooked chicken can be frozen in an airtight container or freezer bag for up to 3 months. Thaw it in the refrigerator overnight before use.
- Reheating: To reheat, gently warm the chicken in the microwave or in the oven (covered with foil, perhaps with a splash of chicken broth or water to maintain moisture) until heated through. Avoid overheating, which can dry out the meat.
Your Go-To Rotisserie Chicken Recipe
This homemade rotisserie chicken recipe is more than just a meal; it’s an experience. The process is straightforward, the ingredients are simple, and the reward is a spectacularly flavorful and juicy chicken that will undoubtedly become a staple in your culinary repertoire. Say goodbye to bland, dry store-bought chicken and confidently embrace the incredible taste of a homemade masterpiece. Gather your ingredients, fire up your grill, and get ready to enjoy the best rotisserie chicken you’ve ever tasted – a dish that embodies comfort, flavor, and the simple joy of home cooking.
