Perfect Roasted Brussels Sprouts: The Ultimate Guide to Crispy, Flavorful Sprouts
For too long, Brussels sprouts have been the target of unfair criticism, often suffering from a reputation as a bitter, mushy, and unappealing vegetable. It’s a sad misconception that this recipe for Perfect Roasted Brussels Sprouts aims to definitively correct. Forget everything you thought you knew about these mini cabbages; with the right approach, they transform into a caramelized, savory, and irresistibly crispy side dish that can convert even the most skeptical palate. Prepare to make a new favorite vegetable!
The Misunderstood Vegetable: Why Brussels Sprouts Deserve a Second Chance
Brussels sprouts have unfortunately been victims of a culinary smear campaign. Their notoriety likely stems from generations of overcooking, typically by boiling them into oblivion, which extracts their sulfuric compounds and creates an unpleasant odor and texture. However, when treated with respect and the proper cooking methods, particularly roasting, they reveal their true, delicious potential. They develop a delightful sweetness, a tender interior, and beautifully caramelized, crispy outer leaves that are nothing short of addictive.
Beyond their surprising flavor, Brussels sprouts are also incredibly nutritious. These vibrant green globes are packed with vitamins K and C, fiber, antioxidants, and anti-inflammatory properties, making them a powerhouse addition to any diet. They support bone health, boost immunity, and aid in digestion. It’s a tragedy that such a beneficial and tasty vegetable has been overlooked for so long!
If your previous encounters with Brussels sprouts involved the frozen, boiled variety, it’s time for a fresh start. This recipe will guide you through the simple steps to unlock their natural goodness, proving that Brussels sprouts are not just edible, but truly delicious.
The Foundation of Flavor: Choosing and Preparing Fresh Brussels Sprouts
The success of this recipe hinges almost entirely on one crucial factor: using fresh Brussels sprouts. While frozen Brussels sprouts certainly have their place – they work wonderfully in casseroles, gratins, or other dishes where their texture is less critical – they are simply not suitable for roasting. Freezing changes their cellular structure, leading to a watery, soft result rather than the desired crispy exterior and tender-crisp interior.
When selecting fresh Brussels sprouts, look for firm, bright green heads that are tightly closed. Avoid any with significant yellowing, wilting, or dark spots. Smaller sprouts tend to be sweeter and more tender, but larger ones work just as well, though you may need to halve them for even cooking.

A Detailed Trimming Guide for Perfect Sprouts
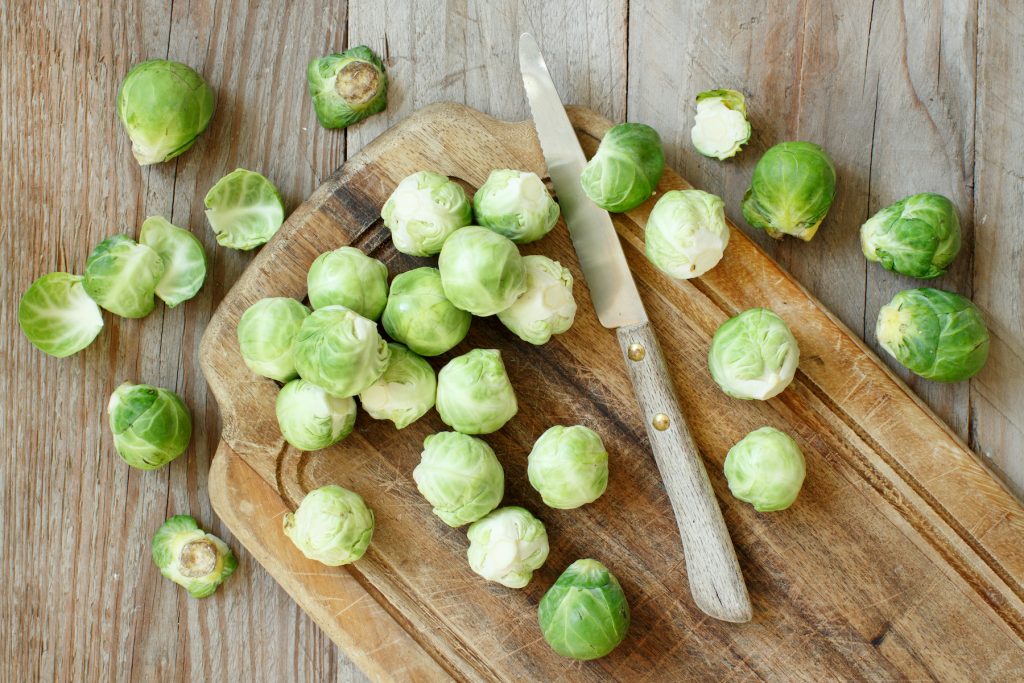
Cleaning and trimming your Brussels sprouts makes a significant difference in the final taste and texture of your dish. When you first inspect them, you’ll notice their striking resemblance to miniature heads of cabbage – not surprising, as they belong to the same family of cruciferous vegetables. Here’s how to prepare them:
- Wash Thoroughly: Rinse the Brussels sprouts under cool running water to remove any dirt or debris.
- Trim the Stem: Using a sharp paring knife, carefully trim off just the very end of the stem. You want to remove any browned, dry, or woody parts. Often, just a small sliver is enough. Be careful not to cut too much, or the leaves might fall apart.
- Remove Outer Leaves: This step is critical for flavor and aesthetics. Peel off any loose, damaged, discolored (yellow or brown), or marked outer leaves. Continue peeling until you reveal the vibrant green, tight inner leaves. This exposes the tender parts of the sprout to the heat, allowing for better caramelization and a more pleasant eating experience.
- Halve or Quarter (Optional): For larger Brussels sprouts, or if you prefer more surface area for browning, you can halve them through the stem end. For very large sprouts, quartering might be appropriate. Smaller sprouts can be left whole. Ensuring similar sizes helps them cook evenly.
Properly trimmed sprouts are not only more appealing but also absorb seasonings better and roast more uniformly, leading to that coveted crispy, tender texture.
The Recipe: Perfect Roasted Brussels Sprouts

Perfect Roasted Brussels Sprouts
4.0 from 34 votes
Ingredients
-
2 pounds fresh Brussels sprouts
-
3 tablespoons extra virgin olive oil
-
1 teaspoon kosher salt or other sea salt
-
1/2 teaspoon garlic salt
-
1/2 teaspoon freshly ground black pepper
Directions
- Preheat oven to 400° F (205° C). This high temperature is crucial for achieving crispy, caramelized edges.
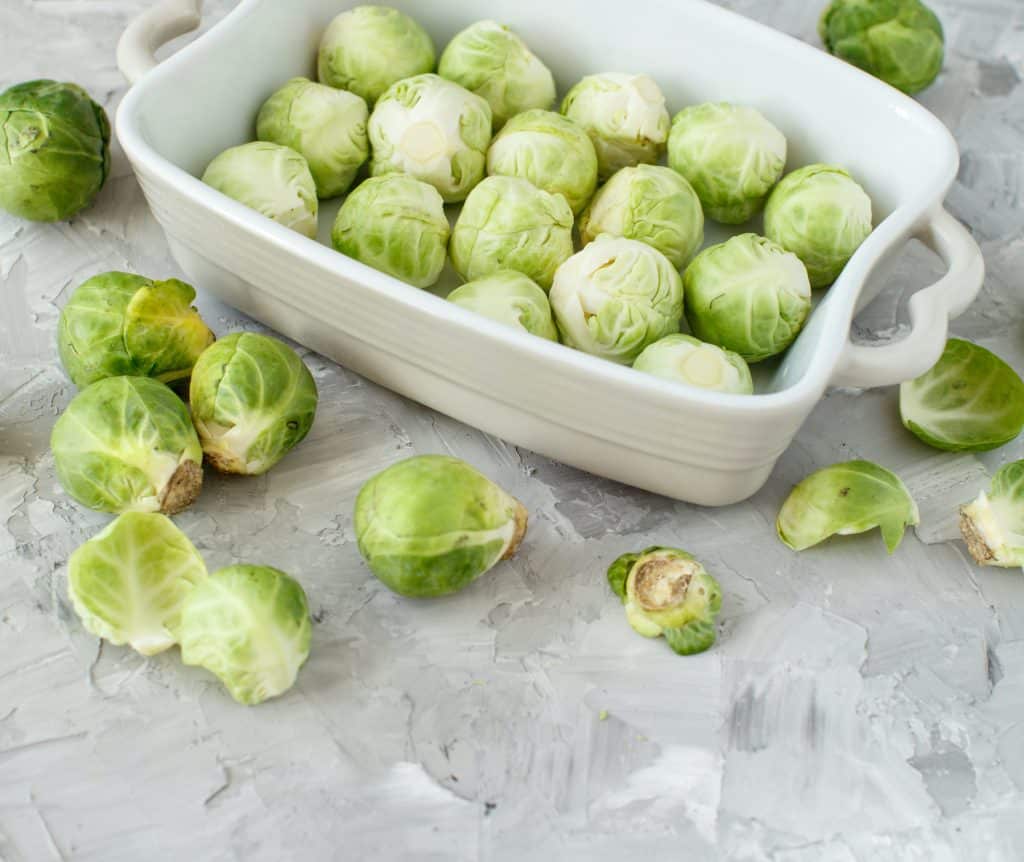
- Wash and trim Brussels sprouts thoroughly. Trim off the very end of the stem and remove any loose, yellowing, or blemished outer leaves until only tight, clean, bright green inner leaves remain. If sprouts are large, halve them lengthwise through the stem.
- Place the trimmed Brussels sprouts in a large baking or casserole dish, or on a sheet pan. It is essential that the pan is large enough to allow the sprouts to rest in a single layer on the bottom without overcrowding. Drizzle generously with extra virgin olive oil, then sprinkle evenly with kosher salt, black pepper, and garlic salt. Toss the Brussels sprouts thoroughly to ensure every piece is coated with oil and seasonings.
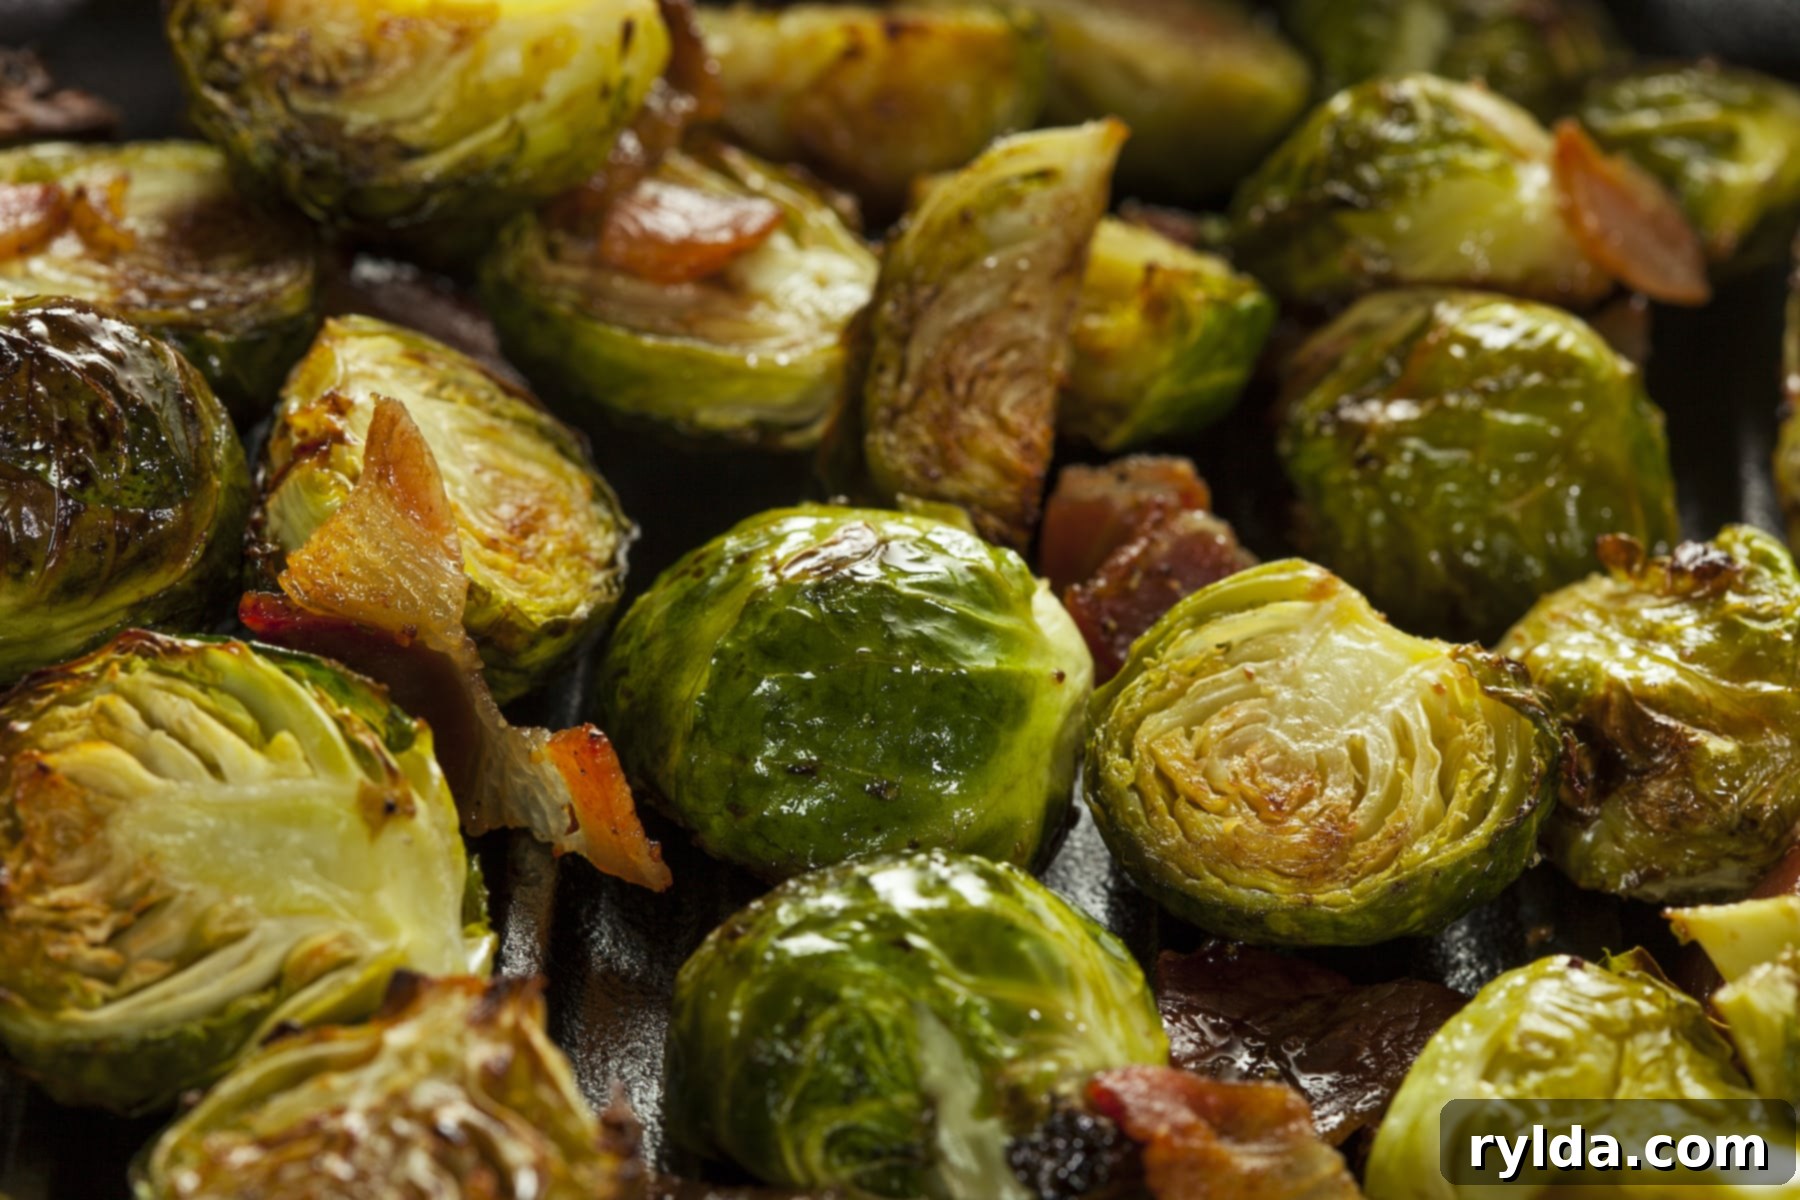
- Place the pan in the preheated oven. Bake for 20 to 30 minutes, or until the leaves are partially browned and have loosened a bit, with distinct crispy areas. For the best results and even browning, stir the Brussels sprouts once or twice during cooking.
Notes
- Brussels sprouts must be fresh for this dish, not frozen, to achieve the desired crispy texture.
- If your local supermarket or farmer’s market offers pre-trimmed Brussels sprouts, you can save time by purchasing those and skipping the trimming step.
- Garlic salt may be substituted with 1/2 teaspoon garlic powder and an extra pinch or two of kosher salt to taste.
- For an extra touch of flavor, consider adding a drizzle of balsamic glaze or a squeeze of fresh lemon juice after roasting.
Mastering the Roast: Essential Techniques for Crispy Perfection
While this recipe is incredibly simple in its ingredient list, its success – that perfect crispy-tender texture and deep caramelized flavor – rests heavily on a few key cooking techniques. The good news is, these techniques are straightforward and easy for even a beginning cook to master, guaranteeing a great pan of Brussels sprouts every time.

Tip 1: The Golden Rule of No Overcrowding
Perhaps the most critical technique for achieving perfectly roasted Brussels sprouts is to ensure your baking dish or sheet pan is never overcrowded. The Brussels sprouts must lie in a single, even layer on the bottom of the pan, with a little space between each one. Why is this so important? When vegetables are packed too tightly, they release moisture, which then steams rather than roasts. This steaming action prevents the Maillard reaction – the chemical process responsible for that coveted browning, rich flavor, and crispy texture. If your pan is too small to accommodate all your Brussels sprouts in a single, unstacked layer, do not hesitate to use a second pan and split the sprouts between them. It’s far better to have two perfectly roasted batches than one soggy, underwhelming one.
Tip 2: Stir for Even Browning and Crispy Edges
To maximize the delicious browned flavor and achieve crispiness on all sides, it’s beneficial to stir the sprouts at least once, if not twice, during the baking process. This simple action allows different facets of each sprout to come into direct contact with the hot surface of the pan, promoting even caramelization and crisping. After about 10-15 minutes, use a spatula to flip and toss the sprouts, redistributing them across the pan. This ensures that every surface gets its turn to develop that wonderful roasted char.
Tip 3: The Power of High Heat
High heat is your friend when roasting Brussels sprouts. Preheating your oven to 400°F (205°C) is essential. This intense heat quickly caramelizes the natural sugars in the sprouts and causes the outer leaves to crisp up before the interiors become overly soft. If the oven temperature is too low, the sprouts will take longer to cook, releasing more moisture and potentially becoming mushy rather than crispy. A hot oven creates that perfect balance of tender inside and delightfully crunchy outside.
Tip 4: Optimal Oil and Seasoning
Extra virgin olive oil is ideal for roasting Brussels sprouts. It has a high enough smoke point for 400°F and imparts a lovely flavor. Ensure the sprouts are well coated but not swimming in oil – just enough to facilitate browning and help the seasonings adhere. For seasoning, the recipe uses kosher salt, black pepper, and garlic salt. Kosher salt provides a clean, coarse saltiness, while garlic salt adds a foundational savory depth. Freshly ground black pepper adds a subtle kick. Feel free to adjust these to your taste; some prefer a bit more pepper, or a pinch of red pepper flakes for heat. You can also experiment with other seasonings like onion powder, paprika, or a dash of dried herbs like thyme or rosemary.
Beyond the Basic: Serving Suggestions and Flavor Variations
Perfect Roasted Brussels Sprouts are incredibly versatile and can complement a wide array of main courses. They shine as a simple yet elegant side dish for roasted or grilled meats, such as chicken, beef, or pork. During holidays and special occasions, they are a fantastic addition to the table, offering a lighter, vibrant contrast to heavier dishes.
To elevate your sprouts even further, consider these delicious variations:
- Bacon Bliss: For a truly indulgent experience, sprinkle with crispy, crumbled bacon pieces immediately after roasting. The salty, smoky crunch of bacon is a classic pairing.
- Balsamic Glaze: A drizzle of high-quality balsamic glaze (either store-bought or reduced from balsamic vinegar) adds a tangy sweetness that beautifully complements the earthy flavor of the sprouts. Add it just before serving.
- Lemon Zest & Parmesan: Finish with a squeeze of fresh lemon juice and a sprinkle of lemon zest for brightness, along with grated Parmesan cheese for a salty, umami kick.
- Maple or Honey Glaze: For a touch of sweetness, toss the sprouts with a tablespoon of maple syrup or honey along with the oil and seasonings before roasting. This creates an even deeper caramelization.
- Spicy Kick: Add a pinch of red pepper flakes or a dash of cayenne pepper when seasoning for those who enjoy a little heat.
- Nutty Crunch: Toss with toasted chopped pecans, walnuts, or slivered almonds during the last 5-10 minutes of roasting for added texture and richness.
Troubleshooting Common Brussels Sprout Issues
Even with the best intentions, sometimes things don’t go perfectly. Here are a few common issues and how to address them:
- Soggy Sprouts: This is almost always due to overcrowding the pan or using too low an oven temperature. Ensure sprouts are in a single layer with space and your oven is adequately preheated. If they’re still soggy, increase the oven temperature slightly for a few more minutes, or move them to a hotter part of the oven.
- Too Bitter: While some natural bitterness is characteristic, extreme bitterness often comes from overcooked or very large sprouts. Ensure you’re not overcooking them (aim for tender-crisp). Smaller, younger sprouts also tend to be less bitter. A touch of sweetness from balsamic glaze or maple syrup can also help balance bitterness.
- Not Crispy Enough: Again, overcrowding is the main culprit. Make sure there’s plenty of space. Also, ensure the sprouts are thoroughly dried after washing – excess water will steam them. Don’t be afraid to let them roast until the outer leaves are deeply browned and crispy.
Embrace the Sprout: A Final Call to Deliciousness
Hopefully, this guide has convinced you that Brussels sprouts are far more than their undeserved reputation suggests. This recipe for Perfect Roasted Brussels Sprouts is a simple, delicious way to reintroduce yourself to this incredible vegetable. With fresh ingredients and a few easy techniques, you can transform these miniature cabbages into a star side dish that delights everyone at the table. So, go ahead, give them another try – your taste buds, and your guests, will thank you!
