The Ultimate Guide to Decadent Homemade Chocolate Glaze: Elevate Your Desserts
Every home baker dreams of that one go-to recipe that can transform everyday desserts into extraordinary masterpieces. This isn’t just a dream; it’s a reality with our recipe for the best chocolate glaze. Forget complicated techniques or obscure ingredients. This incredibly easy and versatile glaze is designed to give your cupcakes, cakes, cookies, and even ice cream bars a professional, glossy finish and a rich, deep chocolate flavor that will leave everyone asking for more. Ready in just minutes, it’s the perfect secret weapon for anyone looking to add that special touch to their baked goods.
Whether you’re a seasoned baker or just starting, this recipe empowers you to add a touch of elegance and an explosion of chocolatey goodness to any sweet treat. Its smooth, pourable consistency hardens beautifully, creating a protective, flavorful coating that locks in moisture and adds undeniable visual appeal.

The Best Chocolate Glaze
Cuisine: American
Difficulty: Easy
Prep time
5
minutes
Cooking time
5
minutes
Total time
10
minutes
This recipe creates a rich, glossy, and beautifully colored chocolate glaze that’s guaranteed to elevate your desserts. The meticulous balance of cocoa powder and butter forms a smooth, luxurious texture, while confectioners’ sugar adds just the right amount of sweetness without being cloying. A touch of vanilla enhances the overall aroma, and a pinch of salt expertly brings out the deep, complex flavors of the chocolate, making every bite unforgettable.
Ingredients
- 6 tablespoons unsweetened cocoa powder
- 5 tablespoons unsalted butter, melted
- 1 cup confectioners’ sugar (powdered sugar), sifted
- 3/4 teaspoon pure vanilla extract
- 2 tablespoons hot water, divided (plus more if needed)
- Pinch of salt (optional, but recommended)
Instructions
- In a small saucepan, combine the cocoa powder and butter. Place the saucepan over low heat and gently melt the butter, stirring constantly, until the mixture is smooth and fully combined, about 3-5 minutes. Be careful not to scorch the cocoa. Alternatively, you can melt these ingredients in a microwave-safe bowl in 30-second intervals, stirring after each, until smooth.
- Remove the saucepan from the heat. Add the sifted confectioners’ sugar, vanilla extract, and the optional pinch of salt to the cocoa mixture. Stir well with a whisk or spoon until mostly combined. The mixture will be very thick at this stage.
- Begin adding the hot water, 1 teaspoon at a time, stirring vigorously after each addition. Continue adding water until the glaze reaches your desired consistency. For a thicker, more opaque glaze, use less water. For a thinner, more pourable, or translucent glaze, add a bit more. The goal is a thick, smooth, and glossy texture that coats the back of a spoon without being too runny.
- Your homemade chocolate glaze is now ready to use! Apply it warm to your desired desserts. For best results, ensure your baked goods are completely cooled before glazing to prevent the glaze from melting or running off.
Why This Chocolate Glaze is a Game-Changer for Home Bakers
A truly exceptional chocolate glaze can transform a simple baked good into a gourmet delight. Our recipe stands out for its simplicity, speed, and stunning results. Unlike heavy frostings, this glaze offers a delicate, thin, and intensely flavorful coating that highlights the dessert beneath while adding its own decadent layer. It’s the perfect balance of sweetness and rich chocolate, designed not to overpower but to enhance.
The glossy finish isn’t just for show; it’s a hallmark of a well-made glaze. This recipe delivers a beautiful sheen that makes your desserts look professionally made, whether they’re for a casual family gathering or a special occasion. Plus, the smooth texture means no gritty sugar feel – just pure, melt-in-your-mouth chocolate bliss.
Unleash Your Creativity: Endless Uses for Your Chocolate Glaze
The beauty of this chocolate glaze lies in its incredible versatility. Once you’ve mastered this easy recipe, a world of dessert possibilities opens up. Here are just a few ideas to get you started:
- Cupcakes: Drizzle or dip cooled cupcakes for a shiny, crackly top.
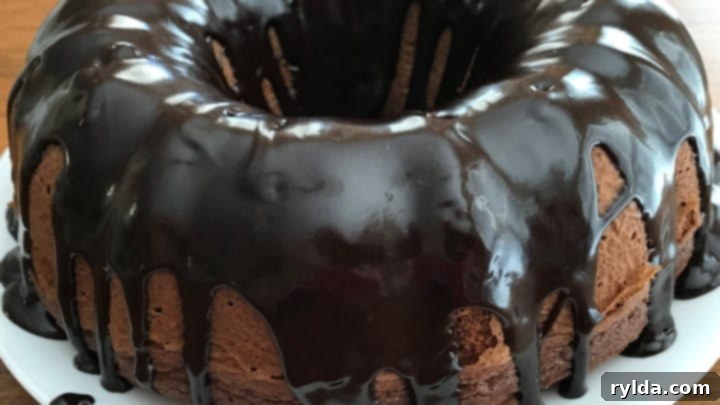
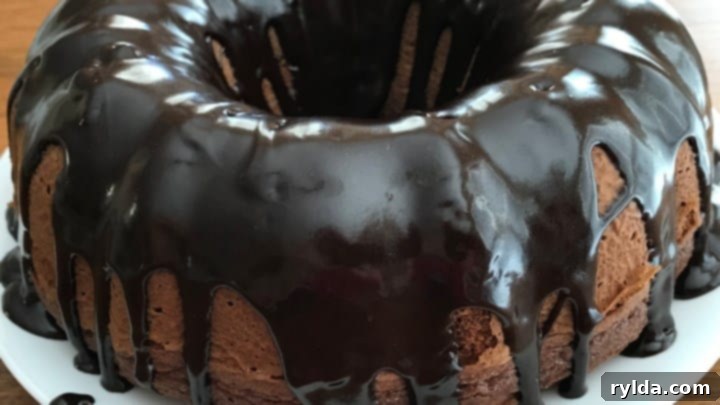
- Cakes: Pour over bundt cakes, sheet cakes, or even layer cakes for a stunning drip effect.
- Cookies: Dip shortbread, sugar cookies, or oatmeal cookies for an extra layer of flavor and appeal.
- Brownies & Bars: Spread a warm layer over cooled brownies or blondies for an irresistible finish.
- Donuts: The ultimate classic pairing – dip freshly fried or baked donuts for a truly authentic taste.
- Eclairs & Cream Puffs: Essential for finishing these delicate French pastries.
- Fruit: A simple drizzle over fresh strawberries, banana slices, or apple wedges turns fruit into a fancy dessert.
- Pancakes & Waffles: Elevate your breakfast or brunch with a luxurious chocolate syrup.
- Ice Cream & Sundaes: While not a traditional “glaze” for these, it can be used as a delicious, quick-setting magic shell alternative if applied cool.
Tips for Achieving Glaze Perfection Every Time
While this recipe is straightforward, a few expert tips can ensure your chocolate glaze turns out flawlessly:
- Sift Your Confectioners’ Sugar: This is a crucial step to prevent lumps and ensure a perfectly smooth, silky glaze. Don’t skip it!
- Adjust Consistency Gradually: Add hot water one teaspoon at a time. It’s much easier to thin a thick glaze than to thicken a thin one. If it becomes too thin, whisk in a little more sifted confectioners’ sugar.
- Temperature Matters: For the best application, the glaze should be warm when you use it. If it cools too much and becomes too thick, gently reheat it over low heat or in the microwave for a few seconds, stirring until it’s pourable again.
- Cool Your Desserts: Always apply the glaze to completely cooled cakes, cupcakes, or cookies. Applying it to warm items will cause it to melt and run off, creating a messy rather than glossy finish.
- A Pinch of Salt: As mentioned, a tiny bit of salt enhances the chocolate flavor, making it taste richer and more complex without making the glaze salty. It’s a baker’s secret weapon for balancing sweetness.
- Choose Quality Ingredients: Since there are so few ingredients, the quality truly shines through. Use good quality unsweetened cocoa powder for the best flavor.
Variations to Customize Your Chocolate Glaze
Once you’re comfortable with the basic recipe, feel free to experiment and customize your glaze to suit different desserts or preferences:
- Espresso Boost: Replace a portion of the hot water with hot brewed espresso or a teaspoon of instant espresso powder mixed into the water. Coffee enhances chocolate flavor beautifully.
- Spicy Kick: Add a tiny pinch of cayenne pepper or chili powder for a subtle, intriguing warmth.
- Minty Fresh: Stir in a few drops of peppermint extract along with the vanilla for a refreshing mint-chocolate flavor.
- Citrus Zest: Grate a bit of orange or tangerine zest into the warm glaze for a bright, aromatic twist.
- Boozy Glaze: Replace some of the hot water with a tablespoon of your favorite liqueur, such as Kahlúa, Grand Marnier, or rum, for an adult-friendly treat.
- Richer Flavor with Melted Chocolate: For a glaze with a different texture and even deeper chocolate intensity, you can melt 4 oz (about 2/3 cup) good quality semi-sweet or dark chocolate chips with the butter and cocoa powder. This will result in a thicker, more ganache-like glaze. Adjust hot water as needed.
- Extra Shiny & Flexible (Corn Syrup): To achieve an extra shiny, slightly more pliable glaze that helps prevent crystallization, you can add 1-2 tablespoons of light corn syrup with the melted butter and cocoa.
Storage and Shelf Life
If you have leftover chocolate glaze, or if you wish to prepare it in advance, proper storage is key:
- Room Temperature: This glaze can be stored at room temperature in an airtight container for up to 2-3 days, especially if made with water.
- Refrigeration: For longer storage, refrigerate in an airtight container for up to a week. The glaze will thicken significantly when cold.
- Reheating: To use refrigerated glaze, gently reheat it. You can do this in a microwave in short bursts (15-20 seconds), stirring well after each, or by placing the container in a bowl of warm water until it reaches a pourable consistency. Stir until smooth before using.
Frequently Asked Questions About Our Chocolate Glaze
- Q: What does this glaze look like?
- A: This chocolate glaze is beautifully glossy, boasting a deep, rich brown color. Its smooth, reflective surface makes any dessert instantly more appealing and professional-looking. It provides a luscious, even coating that enhances both appearance and flavor.
- Q: What is the texture like?
- A: Thanks to the combination of melted butter, fine confectioners’ sugar, and cocoa powder, this glaze has an incredibly smooth and silky texture. It’s pourable when warm and sets to a firm, yet delicate coating that isn’t hard or brittle. When properly made, there’s no grittiness whatsoever.
- Q: How long does it take to cool and harden?
- A: Typically, this glaze will cool and harden enough for serving within about 20-30 minutes, especially if applied to a completely cooled dessert. The exact time can vary depending on the thickness of the glaze, the temperature of your kitchen, and the type of dessert it’s on.
- Q: Can I make this chocolate glaze ahead of time?
- A: Absolutely! This glaze is perfect for making in advance. Simply prepare it as directed, let it cool completely, then store it in an airtight container. When you’re ready to use it, gently reheat it until it’s pourable again, stirring well to restore its smooth consistency.
- Q: My glaze is too thick/thin. How can I fix it?
- A: If your glaze is too thick, gradually stir in a few more drops of hot water (or milk/cream for extra richness) until it reaches your desired consistency. If it’s too thin, whisk in a tablespoon or two of additional sifted confectioners’ sugar until it thickens. Patience is key when adjusting consistency!
- Q: Can I use milk instead of water?
- A: Yes, you can! Using hot milk or cream instead of hot water will result in an even richer, creamier glaze. Start with a smaller amount and add gradually, as the consistency might be slightly different.
This “Best Chocolate Glaze” recipe is more than just a topping; it’s a versatile tool that empowers you to elevate your baking. Simple, quick, and undeniably delicious, it promises to add that coveted professional finish and rich chocolate flavor to all your favorite desserts. Experiment with it, make it your own, and enjoy the delicious results!
